


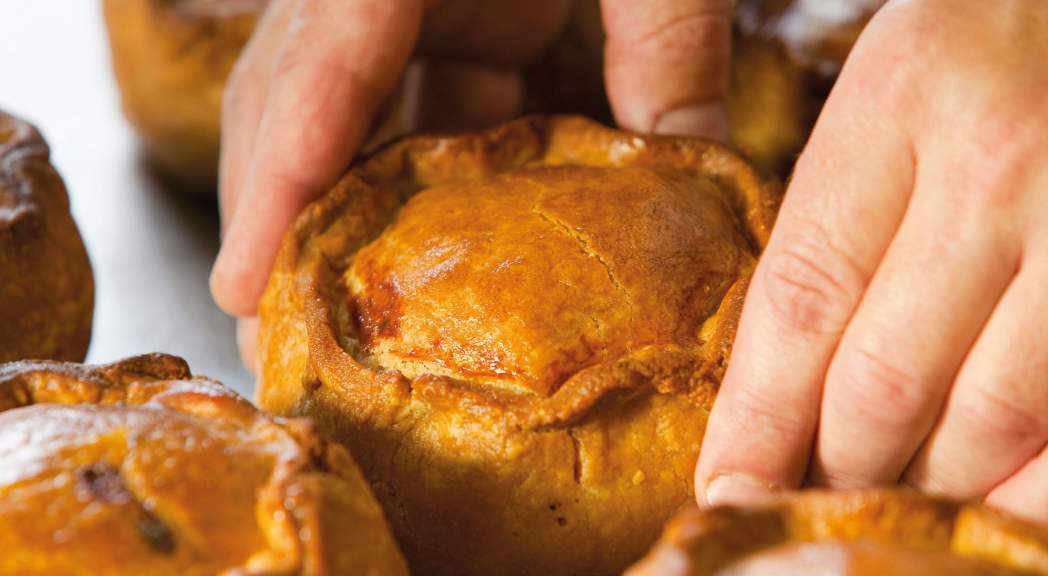
Step-by-step: How to make the perfect pork pie
Great British Food
The expert bakers at Dickinson & Morris have been making impeccable Melton Mowbrays for 160 years, so they should know a thing or two about achieving pie perfection! Here they share their award winning recipe
Makes: 1 x 450g pie
For the pastry:
120g plain flour
2.5ml salt
60g lard
35ml water
Beaten egg, to glaze
For the filling:
225g lean pork, (shoulder is ideal), chopped
Salt and pepper
125ml hot pork stock
15g gelatine
Special kit: Pork pie dolly or jam jar
To make the pastry: Sift the flour and salt into a warm bowl and rub in 15g of lard. Gently heat the remaining lard and water together until boiling, then add to the flour, mixing until the dough is cool enough to handle. Knead well to ensure no air is in the pastry. Keep aside a quarter of the pastry for the lid. Roll the remaining piece of pastry into a ball and leave in the fridge overnight.
To make the filling: Dice the fresh uncured pork into small pieces and season well with salt and pepper. To make the jelly: Make the jelly at a later stage, whilst the pie is in the oven, by dissolving the gelatine in pork stock.
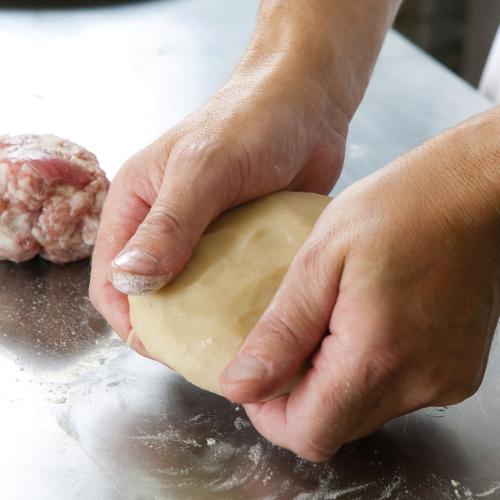
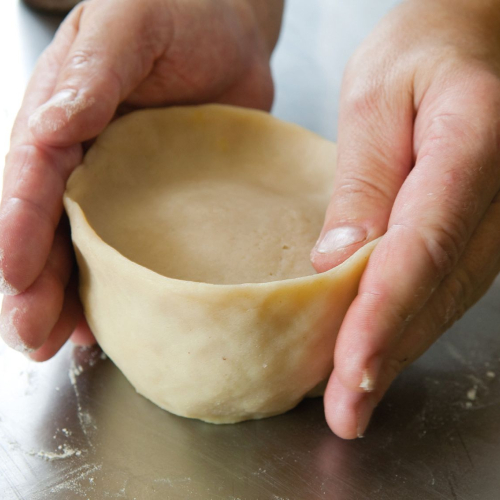
STEP ONE: Remove the pastry from the fridge at least 2-3 hours before making the pie case. Begin by gently squeezing the pastry ball between your hands so that it becomes pliable and mouldable– take great care not to overwork it. Loosely form into a flattened ball.

STEP TWO: Using a floured surface, circle the pastry between your hands to begin bringing the wall sides up.
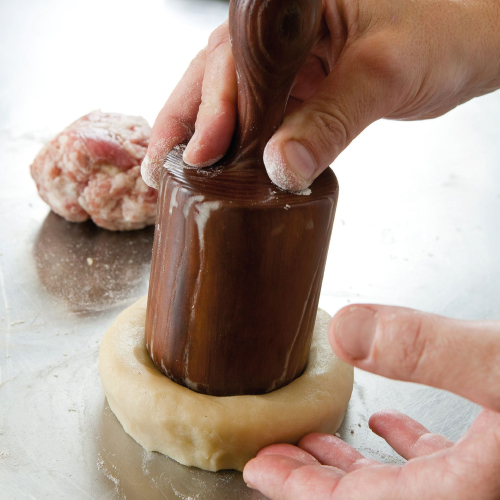
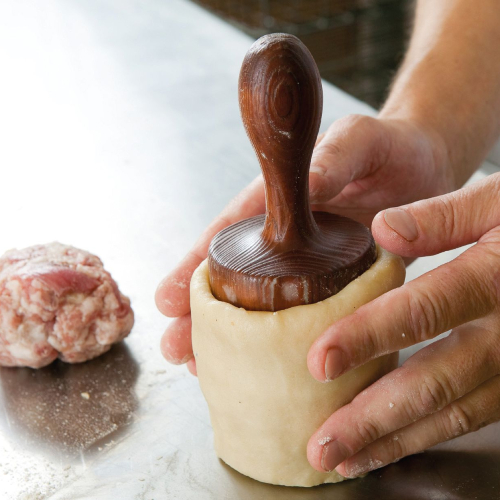
STEP THREE: Take your dolly, or if you do not have one of these, a regular sized jam jar, and push firmly into the centre of the pastry. This should raise the wall sides up and outwards, ready for shaping. Whilst rotating the dolly in a circular motion, squeeze the pastry with your hands and at the same time work the pastry up and around the body of the dolly. Be careful not to push the dolly through the bottom of the pastry case! The pastry should have a regular and even thickness all the way round.
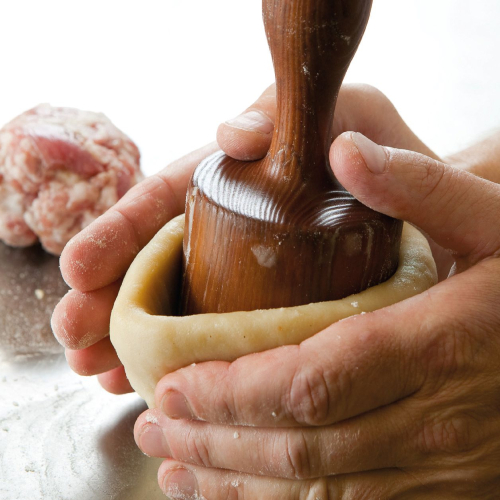
STEP FOUR: Raise the pastry to the top of the dolly and prepare to remove the dolly from the pastry case.
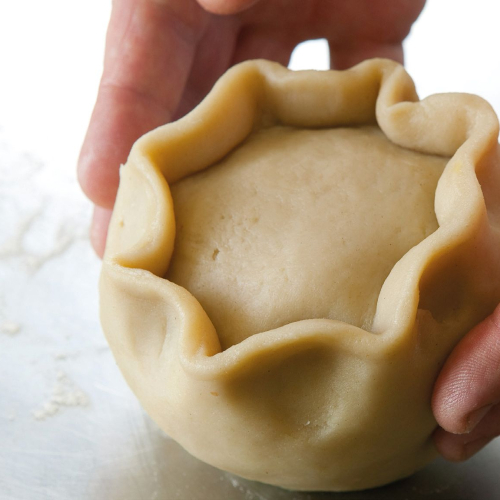
STEP FIVE: Gently remove the pastry case from the dolly by teasing the pastry away from the sides with your thumbs.
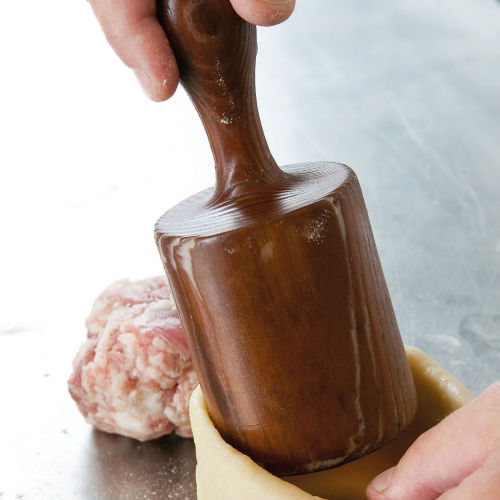
STEP SIX: Slowly remove the dolly from the case.
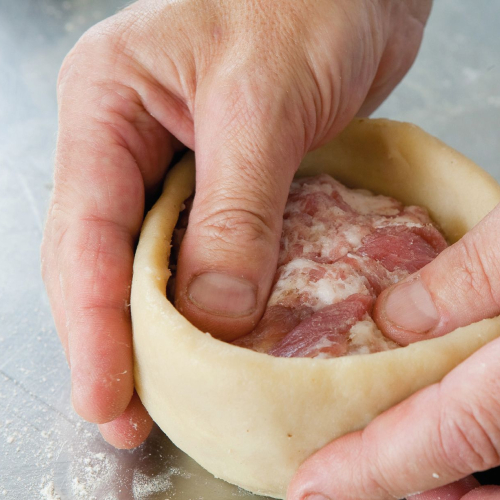
STEP SEVEN: Firmly place your ball of coarsely chopped, seasoned fresh pork into the pastry case, moulding the sides to the meat to ensure no air remains in the body of the pie.
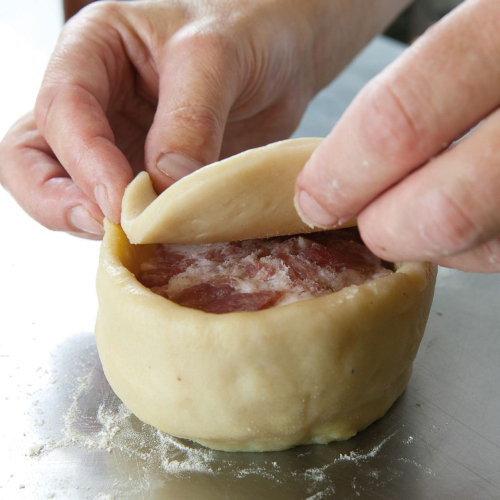
STEP EIGHT: Damp the inside rim of the pastry case with egg. Roll out the reserved pastry to an even thickness and cut out a circular lid. Place on top of the meat and pastry case.
STEP NINE: Seal and finish the pie by hand, gently pinching the lid and wall sides together. It’s very important to ensure the lid is very securely sealed to the pastry case otherwise the sides will collapse during baking.
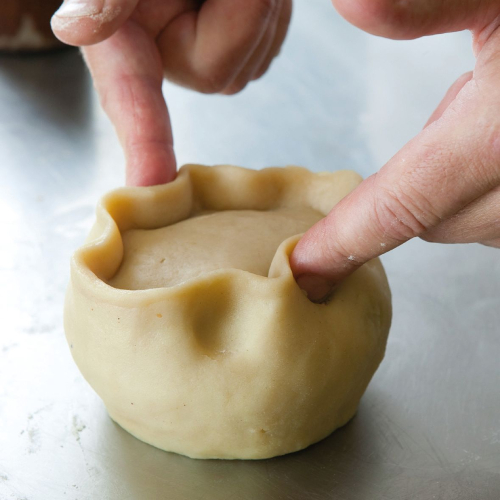
STEP TEN: At opposite points around the circumference of the pie push the sides in to create a crimped finish to the top of the pie. Chill the pie for at least 1 hour in a fridge, or for best results, overnight.
STEP ELEVEN. Your pie will now be ready to be placed in the oven! Just lightly brush the top of the pie (not the crimp) with egg and make a hole in lid centre. Place on a baking tray, and bake in the traditional way – withouta supporting hoop – to give a distinctivebow-sided shape to the walls. Bake in the oven at 220°C/Fan 200°C/Gas 4 for approximately 1.25 -1.5 hours.

STEP TWELVE. Once baked until a rich, golden brown, cool the pie, make two holes in the lid and pour in the jelly. Leave to cool further, ideally overnight, in a fridge.
For more information about Dickinson & Morris visit porkpie.co.uk
-
 Blog
Blog• one month ago -
 Blog
Blog• one month ago -
 Blog
Blog• one month ago -
 Blog
Blog• 2 months ago

-

The Best British Easter Eggs 2024
one month ago -

Our pick of the bunch for your Easter table
one month ago -

Five Easy Ways to Reduce Food Waste
one month ago
